Physical Address
304 North Cardinal St.
Dorchester Center, MA 02124
Physical Address
304 North Cardinal St.
Dorchester Center, MA 02124

[ad_1]
Why do footprints really matter?
Footprint doesn’t tell you “the candle looks good” – it tells you who actually bought/sold at each level
Absorb: A large amount of bid/ask, absorbing the opponent’s attack without breaking the level
Aggression: clear entry to market order (stacked imbalance)
Liquidity Grab: Quickly breach a known level, stop loss and then return
Delta Divergence: Price rises but delta weakens → usually a distribution/trap
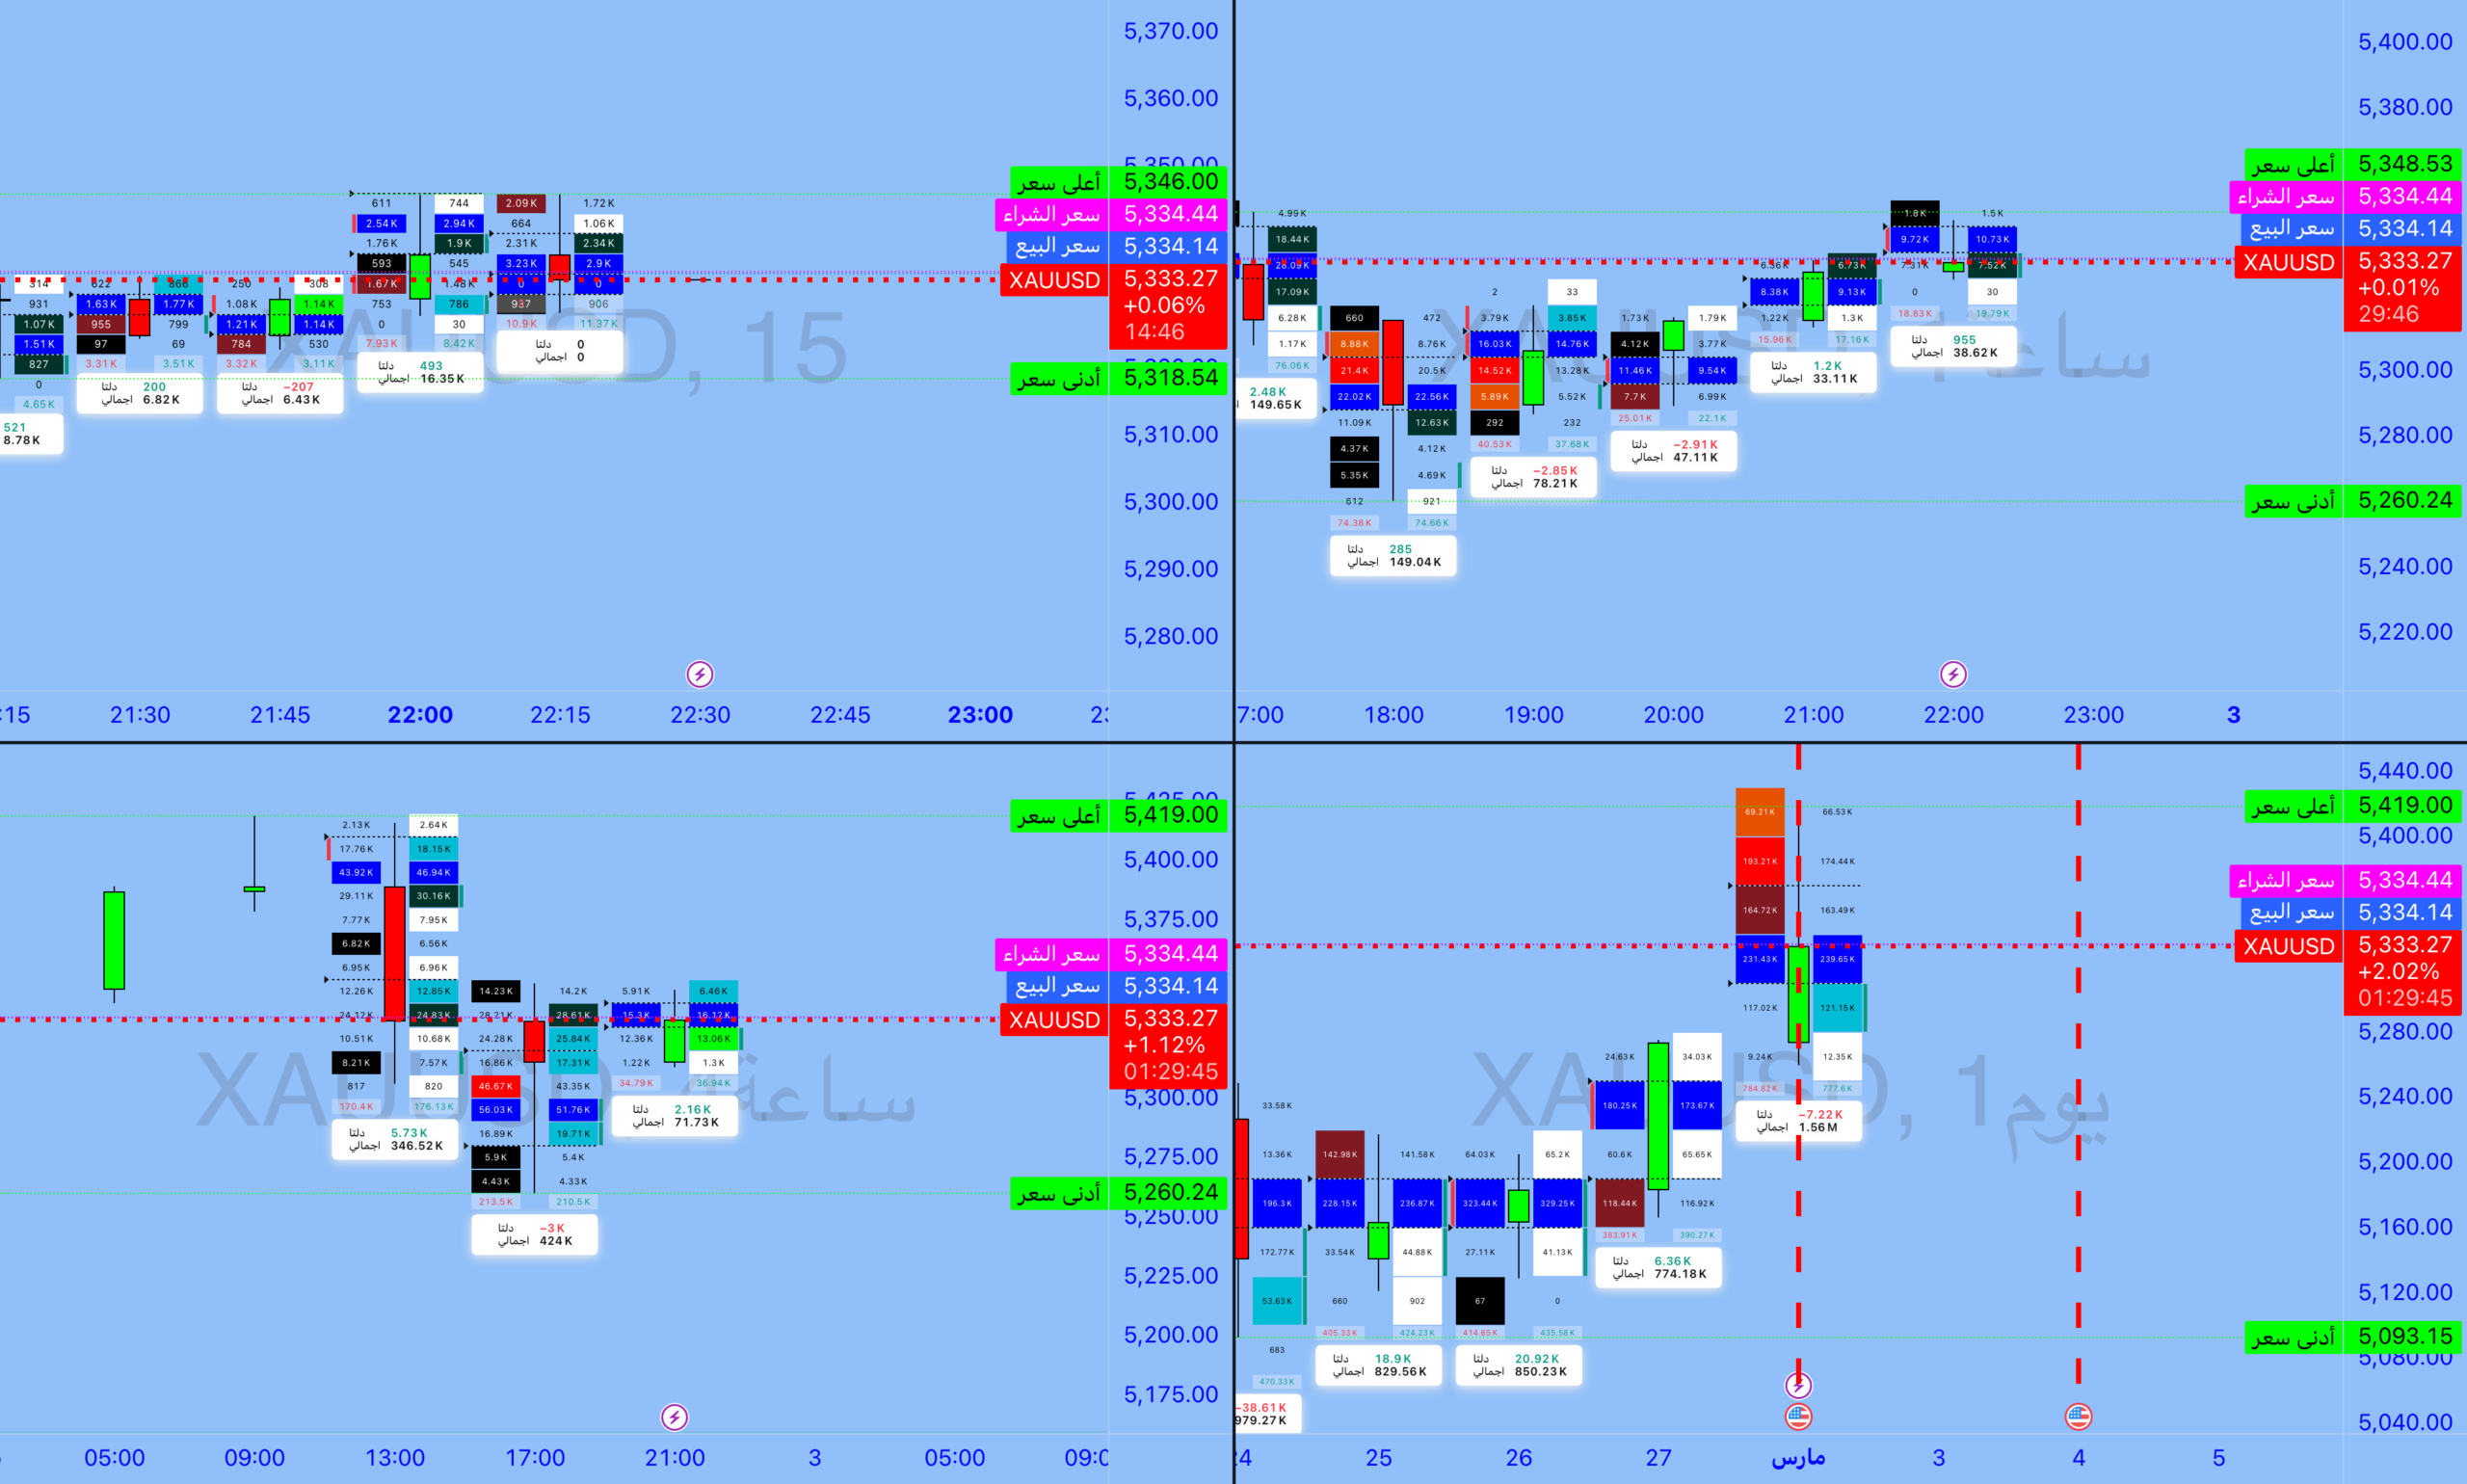
Fast multi-time range photo reading (XAUMO)
15m (tactical)
XAUMO status: retest + direction: bear
Recent Fib: 38.2% @ 5330.64
ATR(14) ≈ 18.39
Meaning: The market is correcting/retesting within a large wave, and the short flow has selling pressure on the rebound.
4H/1D (structure)
Reversal (REV) appears, direction: bear more than one shot
Daily: Fibonacci Path: 88.6% Retracement @ 5289.38 as a deeper stop if the breakout occurs
Meaning: Any rise above resistance is considered a retest until we see clear acceptance above the sell zone
Institutional liquidity graph (levels you see)
I think it’s the area, not a sacred number
Selling Resistors (Supply/Distribution)
5339.89 (clearly 78% level)
5348.04 (R2) (formerly listed as “Break/Accept”)
5356.71 (-33% according to retest table)
5420.29 (R3) + high ~5419 (from daily snapshot: large distribution area)
Need/Defense
5311.12 (R1) (coaxial and repeating)
5308.01/5306.52 (bottom/closed shaft)
5289.70–5285.31 (extended + compatible with daily path 5289.38)
If major demolition occurs, deeper: 5201.95 (S1) then 5129.70 (S2)
The organization’s footprint on this map – what are we monitoring through its footprint?
When supported (5311 → 5306)
Only enter if you see clear absorption: price touches/breaks slightly and delta improves or buy absorption occurs
Or breakout fails: sweep below that level, then quickly return above it (stop hunting then take back)
At the resistor (5339 → 5348 → 5356)
Enter sales only if you see stacked sales imbalance + refuse to close position above that level
Or Delta tries to break out and weakens (no fuel upside)
Ready Execution Plan (MTF + Footprint Confirmation) – SL1/SL2 and TPq/TP2
For educational purposes only – does not constitute a recommendation
Scenario A – Scalping long from support defense
Area: 5311.12 to 5308/5306
Entry conditions: Sweep + back to above 5311 or absorb clear
Input: 5311–5309 subject to confirmation
SL1 (Remission): Close below 5306 15m
SL2 (tailgate): tailgate under 5301
TPq: 5330.64
TP2: 5339.89, or 5348.04 if acceptance occurs
Situation B — Lack of intraday distribution resistance
Area: 5339.89 to 5348.04 (even extension: 5356.71)
Entry Conditions: Rejection + Sell Imbalance/Negative Delta on Breakout
Enter: 5340–5348 after explicitly rejecting the signal
SL1: Close above 5356.71
SL2: Above 5361.30 if you want space against sweep
TPq: 5330.64
TP2: 5311.12 then 5308/5306
Scenario C — Further liquidity grab and then reversal (Buy Flush)
If 5311 breaks out and closes significantly, focus on 5289.70–5285.31 (compatible with 5289.38)
Entry: After recycling/absorption within the area
SL1: Close below 5285
SL2: Tail below 5277.27
TPq:5311
TP2: 5330 then 5339
Quick checklist before pressing any buttons
Are you in the zone or in the text? (text = noise)
Is there footprint confirmation or is it just a feeling?
Is the level Accept or Reject?
Does the delta value confirm or refute the trend? (disagreement = danger)
Does SL1/SL2 make sense for current ATR? (15m~18, up to 4h)
in conclusion
5311 Defense/Resolution Axis
5339–5348 Sales/distribution cap if not explicitly accepted
A breakout of 5311 opens the way to a deeper path to 5289 ahead of any sizeable rally
Rules: Trading area + Confirm footprints + Use SL1/SL2 to protect yourself
[ad_2]
Source link